Hawksbill Peak is the highest point in Shenandoah National Park at 4,049 feet, and it's been on my to-do list for a few years now. It's a fairly short loop hike (a little over 3 miles), totally doable for kids, and has spectacular views at the top. I organized this as a group event for my church and it turned out really well.
Lesson learned the hard way: There are TWO trail heads from the parking area.
This was supposed to be a counter-clockwise loop that would go up slowly over about two miles, then come down a shorter, steeper route to the parking lot.
Well, I got us on the wrong trail head and ended up going UP the short, steep route to the top, but then we had a nice leisurely hike back to the parking lot following the path clockwise instead. As a result, here's what our altitude profile looked like:
One of my sons went charging up the hill and wasn't phased at all by the steepness. The other moaned and groaned and I wasn't sure I was going to get him to the top without dragging him, but after a lot of cajoling him and distracting him with conversation we made it to the top. When we got to the top and he looked out at the view of the Shenandoah Valley, he said, "THAT was worth it!"
My boys on top of Hawksbill Peak
Blunoz & Sons on top of Hawksbill
It was a gorgeous day! Mid 70s and a light breeze was blowing. We packed our lunches to bring with us, so we sat and enjoyed lunch there at the top with the splendor of the Shenandoah Valley before us.
Most of the trail is under the shade of trees. (Picture by Jason R.)
The trails are well-marked with blazes on the trees.
Of course, I had to stop and admire the flowers along the way.
I've been anxious to get out for a hike ever since I got back from my last patrol, but have been pretty busy with other things. Now that those things have settled down, I was able to get out on the trail with my friend Rob yesterday. He wanted to conquer this thing called Mailbox Peak. I was game to give it a try and test my limits, but my body is pretty angry with me today.
I was aware of the steepness of a hike being a significant factor in a hike's difficulty. Hiking books and websites like the Washington Trails Association consider anything over 1,000 feet per mile a "difficult" uphill slope. Because of that, I have been keeping a Hiking Log spreadsheet that tracks the mileage, elevation gain, and slope (in feet per mile) of each hike I've done. I use it to evaluate new places I want to hike by comparing it to previous hikes I've done, both with and without kids in tow.
I've done two hikes in the past that crossed that 1,000 feet per mile threshold of difficulty, both in Hawaii about two years ago - Koko Head and Olomana. The longest hike I've done was the Elk Mountain hike last summer at 7.2 miles, and I've been wanting to try more, longer hikes like that.
So reading the description of the Mailbox Peak hike, I figured 6 miles and > 1,000 feet per mile would be a good test of my endurance - not quite as long as my longest hike, but balanced out with the steeper slope.
Yeah, that wasn't very smart of me.
Aside: Have you ever heard that comedian Bill Engvall? He does a routine called "Here's Your Sign," where he describes how stupid people should be required to wear signs.
Engvall's "Here's Your Sign" routine is pretty darn funny, but after yesterday's climb, I have to say I should be wearing one of those signs.
Here are a couple of facts I neglected to mentally digest before embarking on this hike climb:
1) While I was able to do two previous hikes > 1,000 feet per mile, they were 1.6 and 3.2 miles long. This was twice as long.
2) The WTA description warns that the first part is flat, so when you take into account the length of the hike that is actually climbing in elevation, it's really over 1,500 feet per mile.
If I plot the Koko Head and Olomana profiles on top of the profile from the Mailbox Peak climb, you can see that Mailbox Peak puts the previous two to shame:
Of note, at the Mailbox Peak trailhead, you will find this warning sign...
Ahem.
For those of you considering going on this adventure, here's a closeup of the trail map:
This genuine smile provided at the beginning of the trail.
The trail was mostly gravel, hard pack dirt, and tree roots. Near the top of the tree-line there were some sections of snow.
The WTA description about this being a trail of heartbreak could use a little more elaboration. You see, after you've climbed... and climbed... and climbed... and you're exhausted and out of breath, and you THINK you've reached the top...
...then you turn a corner and see there's no endpoint in sight. Just another near-vertical slope to climb through steep switchbacks. Then, after you've climbed... and climbed... and climbed some more, and you think you've reached the top... You turn another corner and see that AGAIN you aren't even close.
The trail is well-marked with these white-diamond trail markers on the trees. Someone was kind enough to take a sharpie marker and write motivational phrases like this on the ones facing uphill.
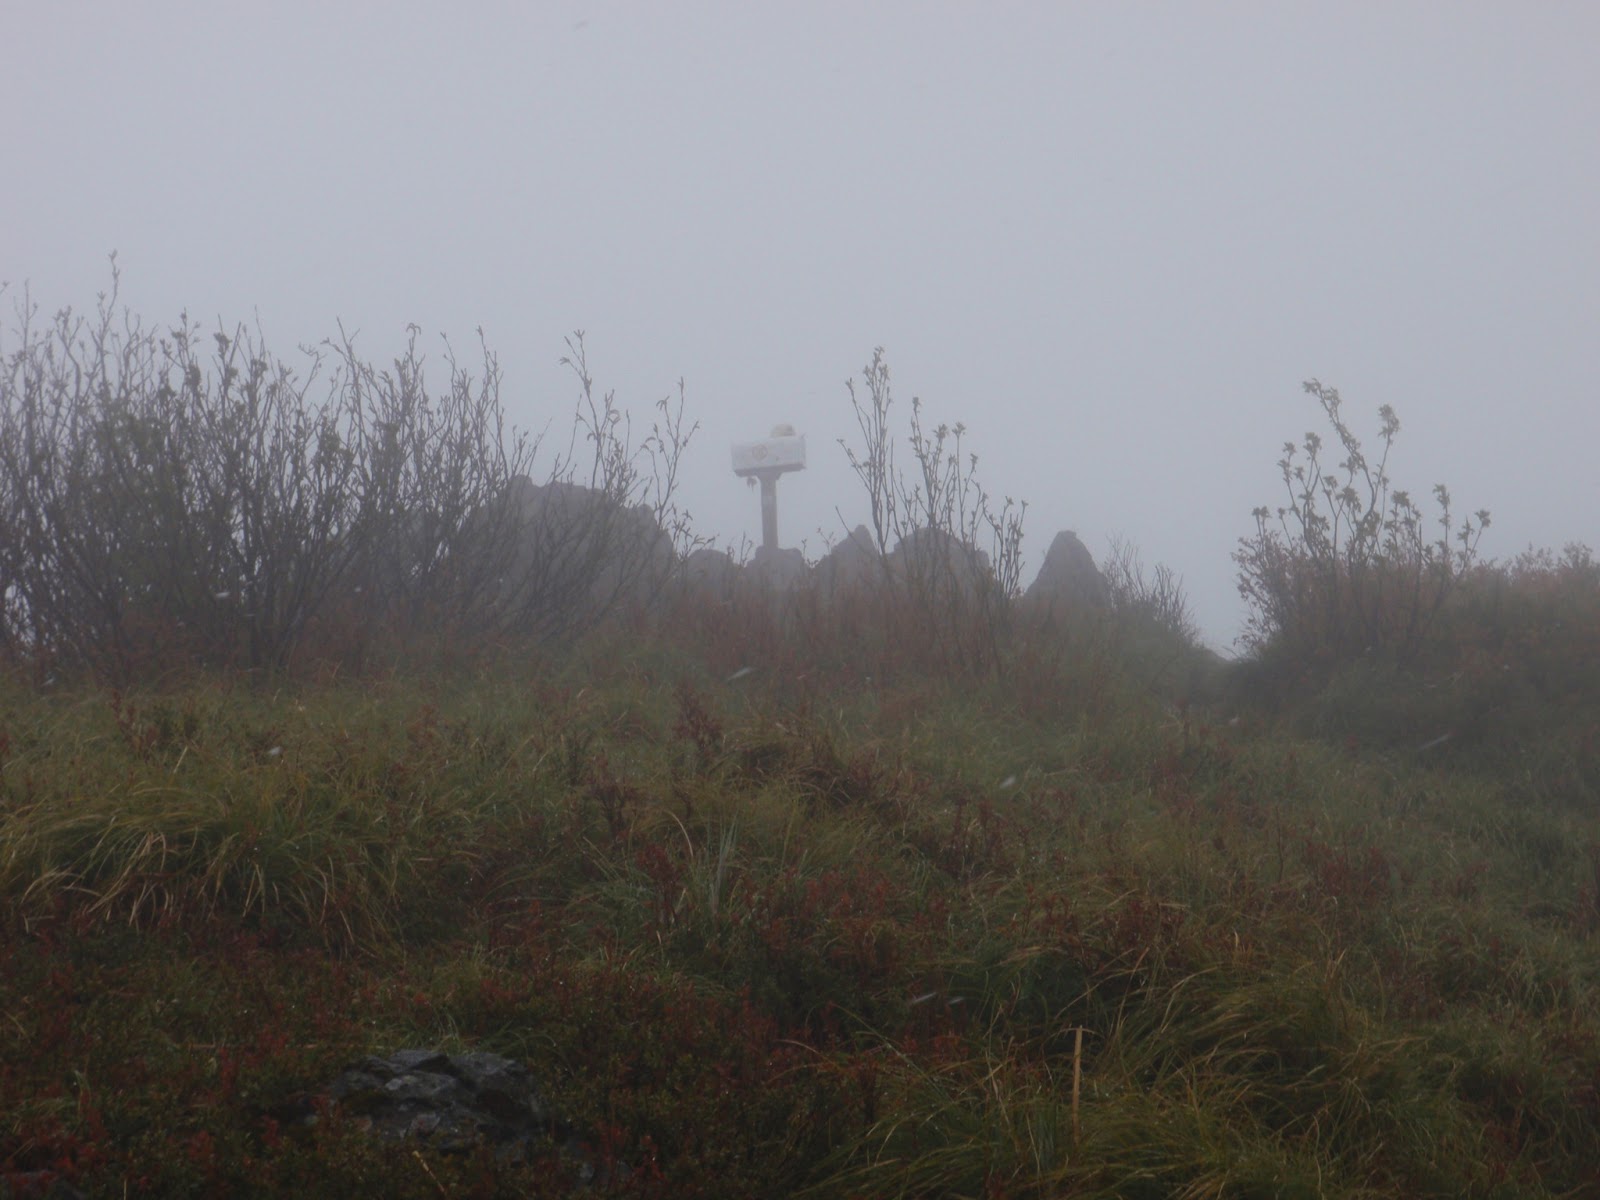
When you come out onto a ledge overlooking I-90 below and you see this view looking up, THAT is the last stretch to the top. Rob is in much better shape than me, and he pushed on ahead to the top. I followed him up slowly. The top was actually in the clouds up there.
Wait... what is that?
Could it be?
I MADE IT!
It took me just shy of 4 hours to reach the top. I suspect the view would be stellar if the peak weren't buried in clouds. What the picture above doesn't show is that it was 39 degrees, winds blowing about 15 knots, and snowing sideways. My hands were so numb from the cold, I couldn't feel the camera buttons. I'm surprised I got this picture. Rob was originally going to make a pot of coffee here at the top, but it was too cold, windy, and snowing, so we headed back down to the overlook above I-90.
Coming back down out of the clouds, there was a nice view of the Snoqualmie Valley. Semi-trucks on I-90 looked like ants.
There's Rob down there making his coffee.
Rob took this picture looking back up toward me near the top.
There weren't many flowers to see on this hike. This was the first time I've seen a pink trillium, but the few that I saw weren't in very good shape.
After eating lunch, we started back down the trail. It rained most of the way, making the trail fairly muddy.
It was pretty tough going back down. I was glad to have two hiking sticks with me. Several times one of my feet slipped out from under me, but I was able to catch myself with my hiking sticks. My legs felt like jello when I got to the bottom, and they're pretty darn sore today.
In the end, I'm glad I did it. I learned an important lesson in self-assessing my own abilities and evaluating the difficulty a potential future hike. I'm thankful for a few answered prayers I said on the way up for the strength, energy, and endurance to make it to the top, and for a few answered prayers I said on the way down that I made it without slipping and without my legs giving out on me from exhaustion. I'm also thankful for my friend Rob inviting me to go with him and for being gracious in waiting for slow-poke me to catch up with him along the way.
Trip Stats:
Summary:
Date: 30 May 2013
Time of Departure: Left Bremerton at 8:15 a.m. and drove around via the Tacoma Narrows Bridge, made one pit-stop along the way and arrived at the trailhead at 10 a.m. We geared up and headed out on the trail at 10:13.
Reached the Peak: 2:03 p.m.
Time of Return: We stopped at the overlook to eat lunch before heading back down. We departed the overlook at 2:44 p.m. and arrived back at the car at 5:07 p.m.
Elapsed: 6 hours 54 minutes
Moving Time (GPS): 3 hours 51 minutes
Stopped Time (GPS): 3 hour 3 minutes
Mileage (GPS): 6.14 miles
Avg Speed (GPS): 1.6 mph
Elevation Gain: 4,722 feet
Max Elevation: 4,841 feet
Weather: Mostly cloudy, intermittent light showers, snowing at the peak.
Winds: Calm in the trees, approx 15 knots at the peak.
Air Temp: 55F at the
trailhead, dropping down to 39F at the peak.
Trail: Well-defined
hard-pack dirt or gravel trail, lots of tree roots.
Crowds? Not crowded, but not alone.
There were about four cars parked at the trail
head. On our way up, we passed about 4 people headed down. On our way down, we passed about 10 people headed up.
Hazards? Some steep
dropoffs. No sources of water.
Kit: Long sleeve T-shirt, cargo pants, L.L. Bean rain jacket, Merrell Moab Gortex hiking boots, ballcap, two walking sticks.
Facilities: There was a privy near the trailhead. There are no sources of water along this trail.
You don't have to read my blog for long to know that I'm a gadget freak. I love electronic gadgets. When I go hiking or kayaking, I need a nerdy vest with half a dozen pockets to hold the GPS, the phone, the camera, etc.
In the category of GPS, I'm a big fan and a stock-owner in Garmin. I started off with a Garmin 12XL way back in 1998. When I got bit by the geocaching bug, I upgraded to the Garmin GPSMap 60CSx, which I still love and use a lot. It was sorta bulky for carrying with me when I went running outdoors, so a few years later my wonderful wife gave me a Garmin Forerunner 405. There were things I liked and things I didn't like about the Forerunner.
Forerunner Likes
- Compact / Wrist-worn. As previously mentioned, it was a little awkward running with the bigger handheld GPSMap 60CSx in my hand.
- Automatic Wireless Data Uplink. I loved that all I had to do was walk into the same room as my computer, and my Forerunner would automatically start wirelessly transmitting the data from my run / hike / kayak / outdoor adventure-du-jour to my computer. It would upload automatically to the Garmin Connect website where I could see where my outdoor adventure took me on a Google street map or satellite image, along with plots of my altitude, speed, heartrate, and anything else I could want to analyze.
Forerunner Dislikes
- Sort of like Gizmo in the movie Gremlins. DON'T GET IT WET!
Yes, yes, it's water resistant and wasn't damaged by getting wet. However, the Forerunner was minimalist on buttons and instead had a touch-sensitive bezel to operate it. It was pretty cool, but the first time I went running in the rain, oh my! I discovered it treated every rain drop as a touch and activated all sorts of different sub modes and features. I think it was telling me how many calories I burned in Swahili, but it wouldn't let my legitimate touches get it back to the display screen that I actually wanted.
Okay, no problem. If you push both buttons at the same time, it locks (or unlocks) the bezel. I would just lock it before going on a hike in the rain or going kayaking where it might get splashed. I just couldn't change screens or modes while it was wet.
- Battery life was meh. I could use it one day for a GPS activity outdoors and then would need to recharge it. If I hadn't recharged it in the previous couple of days, then the battery was likely to die in the middle of my excursion.
Again, no problem. It was manageable. I just made a point to put it on the charger the night before any outside activities.
Overall, I liked the Forerunner and used it A LOT. I've got 153 entries in my Garmin Connect log dating back to October 2008 to prove it, and you can see the Garmin Connect widget on most of my hiking and kayaking blog posts.
Enter the Fenix.
I was pretty excited when I read about the Fenix on the Garmin website, primarily because it's waterproof and the battery life is much better than the Forerunner. I got the Fenix in the autumn just before leaving on patrol, so I haven't taken it out on any real outdoor adventures kayaking or hiking yet, but I've been messing around with it on my way to and from work and while at sea.
So far, it's living up to my expectations.
Got wet? No problem! It's been pouring rain here and with five buttons on the Fenix, I can do any sort of manipulations I want while it's wet. No touchscreen to go haywire with rain drops.
The battery has been doing GREAT. With the old Forerunner, my only battery indication was when the Forerunner DIED (typically in the middle of a run or hike). The Fenix has a handy indication on the screen to tell you the exact percentage charge status of the battery. I have been able to use it for weeks at a time just as a watch with the GPS turned off. I have also used it for several hours at a time standing on the bridge of a submarine with the GPS turned on and had PLENTY of battery capacity left over.
I love that it is very adaptable. You can have as many or as few screens as you want. You can customize each screen with different data parameters to display. You can customize the buttons to do just about anything except order a pizza.
I like that it monitors temperature and includes that in the plot of speed and other parameters on Garmin Connect. Now, the temperature reading isn't accurate when it's on my wrist and sensing my body heat, but I've been using it in very cold environments, attached to the outside of my cold weather gear. I also got one of the remote temperature sensors that I will attach to my backpack when I go hiking in the summertime, and it will wirelessly transmit the temperature to the Fenix at some periodic interval.
My only complaint about the Fenix is: No automatic uploads. It doesn't transmit wirelessly like the Forerunner did. I'm okay with that. I don't mind plugging in a USB cable. The frustrating part is when I open Garmin Connect, it "sees" the Fenix is there and plugged in, and I click on "upload activities," and it says there are no activities to upload. In order to get the data from my Fenix into Garmin Connect, I have to manually open the file and import it into Garmin Connect. So it's a little labor intensive, but I can live with that.
Overall, I'm ecstatic with the Fenix, and I'm anxious to go try it out hiking and kayaking now that I'm back in port.
This was supposed to be hike #3 in the Falcon Guide titled Best Easy Day Hikes - Olympic National Park. Unbeknownst to me, at some point between when the book was published in 2008 and now, the road was washed out about 5 miles short of the entrance to the National Park.
At the point where the road is washed out, we found about a dozen cars parked (see the victory pose photo below), so we figured people were just beginning their hikes from that point onward. We encountered a few hikers coming out and asked what it was like. They told us after the initial switchback trail up over the hill above the washout that it was pretty flat and easy.
This is what the switchback part of the trail looked like.
The trail over the hill was well-defined hard pack dirt and easy to follow. When we got over the hill, the trail dropped us back down onto Dosewallips Road on the other side of the washout.
Blunoz Self Portrait by the Dosewallips River
From the point we rejoined the Dosewallips Road to the Elkhorn campsite, we enjoyed the deafening roar of the river at our side. Still photos don't capture the essence of walking along the roaring river, so I had to post a short video clip instead. The section of road from the washout to the Elkhorn campground was a nice flat road and would have been nice for a bike ride. We saw a family riding their bicycles near the campground. You'd just have to push your bikes up over that first hill.
The Elkhorn campground was a nice place and clearly still gets used. There was no privy or any sort of facilities available though. We spent some time by the river skipping rocks and marveling at how crystal clear the water was. Considering how little rain we've had in the last couple of months, it was odd to see so much water in the river, but it was frigidly cold glacier runoff.
From this sign by the Elkhorn campground onward, the road starts a steady uphill climb and diverges away from the river. If you look at the altitude profile in my Garmin track below, you'll see that the trail was fairly flat - about 100 feet of elevation gain over the first 1.4 miles, then it gained a little over 300 feet in the next 0.6 miles as we climbed up the road away from the Eklhorn campground. There really wasn't much to see here. When we got 2 miles away from where we parked the car, we decided to head back down again.
There were lots of these little white and black butterflies flittering about all around us along the trail.
We also spotted a couple of different catepillars, lots of pearly everlasting and some other common flowers along the way.
Long shadows at the end of the day.
On the hill over the washout.
Victory Pose
This was a first. When we arrived back at the car, the boys declared "victory pose!" and ordered me to take a photo of them. Goofballs.
Hike Stats: When I'm searching for places to hike with my
kids, I appreciate having some basic facts and figures about the hike
for me to judge if it's doable with my kids. With that in mind, I hope
other parents considering this hike find the following information
useful.
Date: 6 October 2012
Time of Departure: Left the house about 10 a.m. Stopped at the Quilcene Ranger Station to stamp my book, then had lunch at Logger's Landing (great food and excellent service). By the time we got up to the end of the Dosewallips Road and started our hike, it was 1:41 p.m.
Time of Return: Around 4:30 p.m back at the car. Held up by the Hood Canal Bridge opening on our way back. Stopped and picked up Mike's Four Star Barbecue in Port Gamble on our way home. Got home around 6:30 p.m.
Elapsed: 2 hours 52 minutes
Moving Time (GPS): 1 hours 48 minutes
Stopped Time (GPS): 1 hour 4 minutes
Mileage (GPS): 5.0 miles
Avg Speed (GPS): 1.8 mph
Elevation Gain: 725 feet
Max Elevation: 1,004 feet
Weather: Clear and sunny.
Winds: None.
Air Temp: 61F climbing to 66F by the car thermometer. It felt a little chilly at spots along the river.
Trail: Well-defined
hard-pack dirt or gravel trail.
Crowds? Not crowded, but not alone.
There were about a dozen cars parked at the washout. We passed about a dozen people along the way going in both
directions.
Hazards? Some short but steep
dropoffs into roaring rapids below.
Geocaches? Didn't bother looking - assumed there were none because it's a National Park.
Kit: Long sleeve T-shirt, shorts, new Merrell Moab Gortex hiking boots, ballcap, walking stick.
Route: Intended to follow the route of #3 in my ONP day hikes book, but never made it to the Dosewallips Park Ranger station due to the road washout. Note to self: Check road conditions on national park website. Instead just hiked along the road. If I didn't have my kids with me, I would have kept going all the way up to the Park Ranger Station.
For my birthday, I asked my family to go with me for a short hike and a bike ride up at Crescent Lake in Olympic National Park about a half hour drive west of Port Angeles. The two destinations I had in mind were #14 and #15 in the Falcon Guide titled Best Easy Day Hikes - Olympic National Park.
On our way up there, we stopped at Fat Smitty's for lunch. One of my shipmates told me they had the best burgers on the peninsula. If you're headed from Kitsap over toward anywhere on the Olympic Peninsula, you can't miss it.
Right on Highway 101 there's this little shack of a restaurant with a huge chainsaw-art carving of a ginormous double-decker hamburger with all sorts of fixings on it. I thought this squat-totem-pole of burger-worship was just an exaggeration to gather people's attention...
Nope.
Their signature item, the Fat Smitty burger really is that big. The waiter recommended it if we hadn't been there before, but didn't offer any explanation of how big it was. The menu also offered no description to warn us of the ginormous greasy monstrosity we would be receiving off the grill.
When the waiter set them down in front of us, my eyes nearly popped out of their sockets, and it took a few moments to get over the shock. The waiter said the record is 45 seconds to eat an entire Fat Smitty burger. He recommended putting all your weight into squashing it down with your palm on top of the burger, then picking it up and not putting it down again until you were all done. I'm sorry to disappoint you, but there was no way I could finish it.
After lunch, we followed Highway 101 along the southern edge of the lake to Lake Crescent Lodge. Just before the lodge is a boat ramp and a parking area for the Marymere Falls trailhead. This was a short hike (1.5 miles round trip) and pretty easy for families with children. Because of that, there were quite a few people there, but it wasn't crowded.
Boys being goofy on the trail.
The trail is hard-pack dirt. It's flat most of the way and has about 80 feet of elevation gain up wood steps the waterfall viewpoint. There are two small bridges to cross. That plus the steps lead me to think this would not be good with a stroller, but we did see several babies in baby-backpacks. Also, there are sturdy handrails going up the steps and at the viewpoint, so you don't have to worry too much about small children falling over the edge.
Bridge
Steps
My eldest son at Marymere Falls
Blunoz Family Photo at Marymere Falls
After leaving Marymere Falls, we drove around to the north side of the lake to take our bikes on the Spruce Railroad Trail. This was not the type of trail I was expecting. We've been on several trails on the east coast that were converted from old railroads, such as the Washington & Old Dominion (W&OD) Trail near our house in Virginia, the Great Allegheny Trail in Pennsylvania and Maryland, the Chesapeake and Ohio (C&O) Canal towpath in Maryland, and the bike path in Wolfeboro, NH.
The Spruce Railroad Trail was built to bring sitka spruce trees to build biplanes in World War I and has since been converted to a trail... of sorts. Not the smooth, easy for a family ride trail I was expecting though.
It was bumpy and rocky and had several dips that made it passable by mountain bike, but not for a gentle family ride. We only went about 2.5 miles then decided to turn around and go back.
My youngest son doing the Karate Kid pose at
one of several dips that we walked our bikes across.
After returning home and looking for more information online, I found this good blog post that included pictures and mentioned how they walked their bicycles for a good portion of the trail. Then I also found a news article that they are GOING to expand this trail into something more like the other railroad bike trails we've been on.
"The 3.5-mile trail will be upgraded to an 8-foot-wide asphalt trail
with 3 feet of adjacent gravel shoulders so it’s accessible to all types
of bicycles, as well as pedestrians, equestrians and people in
wheelchairs.
In addition, both of the historic railroad tunnels will be reopened
as part of the trail and a new segment will be built near Lyre River to
bypass and mitigate the existing steep grades in that area." (Quoted from the article linked above)
It would have been a nice easy, nearly flat trail for a hike. I would like to go back sometime and do it on foot.
On our way back, we stopped for an awesome dinner at theBushwhacker restaurant in Port Angeles. This was our second time eating dinner here. The first time, we stopped here after our hike up Hurricane Hill, and our eldest son has been asking us to go back to Port Angeles so we could eat dinner at the Bushwhacker ever since. We weren't disappointed. Both times we have received exceptionally good service and fantastically delicious food. Plus, they serve a locally bottled root beer that's top notch.
Although the bike path was a little bit of a disappointment, overall it was a great day. I'm thankful to my family for entertaining my desires for how to spend my last day as a 39 year old. :-)
This is hike #9 in the Falcon Guide titled Best Easy Day Hikes - Olympic National Park. It's also the second most difficult hike listed in the book, the most difficult being Mount Zion that I did a few weeks ago.
One of my O-gang shipmates expressed an interest in doing a "longer" hike this weekend. We put the invitation out to the rest of the wardroom and ended up with a group of four of us plus one spouse heading out to Olympic National Park. We offered up a small sum of cash to get someone to drop us off at one end and pick us up at the other, and it worked out really well.
First we drove up to the Hurricane Ridge visitor's center. I stamped my National Park passport there. I've also been using the National Park stamp on the pages of the day hike guide book to show when I've done each hike. We used the facilities there and then headed out on the 7.5 mile dirt and gravel bumpy Obstruction Point Road.
Obstruction Point Road
I was surprised how many cars and people there were at the Obstruction Point trailhead. There were probably a dozen cars in the parking lot and several people loading up their backpacks. Apparently we weren't the only ones who thought this was a rare opportunity to get out on this trail that isn't accessible for a large part of the year.
Time Stamp at the Obstruction Point Trailhead
Beginning of the trail. There is a fork in the trail here. The trail going down to the right is the Badger Valley Trail. The trail heading up the slope to the right above the trees is the Obstruction Point trail.
This is the view looking down into Badger Valley from near the trailhead. You can see the Badger Valley trail leading down below the trees on the left. The Badger Valley trail eventually goes back up to rejoin the Obstruction Point trail at the 2 mile mark.
Looking back the way we came. The Obstruction Point trail head is just above the center of this photo, and you can see the trail going off to the right edge of the photo, looping up to the top of the ridgeline.
On top of the ridgeline with the snow-capped Olympic Mountains to the southeast in the background.
There were a lot of these all over the top of the ridgeline. I kept thinking I might hear a Who. I'm still trying to identify them in my flower books. In addition to these, we also saw a lot of pearly everlasting, gray thistles, purple lupines, and yellow daisies.
Panorama shot from somewhere around Elk Mountain. In the distance on the left side we could see a couple of lakes and waterfalls crashing down below the lakes. In this picture, one of the waterfalls looks like a small white line. I was glad I brought my binoculars, because the waterfalls were pretty cool.
Looking northwest from the top of the ridgeline, we could see the Hurricane Ridge Road sloping up to the left. We could also see across the Strait of Juan de Fuca to Victoria, BC, and beyond. Again, I was glad I brought my binoculars to see the details in the far distance. My little point-and-click camera doesn't do the view justice.
We stopped at Roaring Winds Pass to eat lunch. It was 3.2 miles into the hike and at a dip in the elevation profile. We had just come down from Elk Mountain and from Roaring Winds Pass would begin climbing again up to Maiden Peak.
Here is an annotated altitude profile of the hike taken from my GPS.
From the southern side of Maiden Peak, there's a pretty good view of The Needles.
The trail wraps counter-clockwise around Maiden Peak, and coming around the east side of the peak looking north a beautiful view of Port Angeles to Sequim opens up. From here, the trail goes down into the trees and follows the ridgeline off to the right (northeast).
Although there were many small mountain wildflowers above the treeline, descending below the treeline brought a whole new slew of flowers.
Scouler's Bellflower
Scarlet Paintbrush
Columbine
Mushrooms (I don't have any clue on identifying these yet).
Time stamp at the end. We made it. The last half-mile or so was pretty brutal uphill climbing to the Deer Park Ranger Station. I was exhausted. Apparently so were the rest of my group, because there was audible snoring and heads slumped over in the back seat within about 5 minutes of starting our drive back down the hill to Port Angeles.
In the car on our way down the Deer Park Road (which is another bumpy, winding, dirt and gravel road similar to the Obstruction Point Road), this was the view out the window looking back the way we came. The last couple of miles of the hike were in the trees along that ridgeline from the left side of the picture going back up to the peaks in the middle of the picture.
My previous Garmin Forerunner 405 had died (battery wouldn't charge) and I had to send it back to Garmin to get it refurbished. That's why my last several hikes didn't have this Garmin Connect map below. This was my first hike out with the newly refurbished Forerunner. The Garmin Connect page allows you to download the trek in XML and view it in Google Earth. It's pretty cool to follow the path we took in a birds-eye view angled down to see the elevation dropping off on either side of the ridge.
Hike Stats: When I'm searching for places to hike with my
kids, I appreciate having some basic facts and figures about the hike
for me to judge if it's doable with my kids. With that in mind, I hope
other parents considering this hike find the following information
useful. Note I did NOT take my kids on THIS hike, and I would not recommend it for small children. There were spots on some pretty steep slopes, and it was a pretty long hike.
Date: 15 September 2012
Time of Departure: Met up with our group in the Kitsap Mall parking lot and headed out shortly after 8 a.m. Arrived at the Hurricane Ridge Visitor's Center to use the restrooms and check out the view at 10 a.m. on the nose. Departed the Obstruction Point trail head about 10:43 a.m.
Time of Return: 2:59 p.m. back in car at Deer Park trailhead. Made a stop at the 101 Diner for milkshakes and arrived home about 5:15 p.m.
Elapsed: 4 hours 13 minutes
Moving Time (GPS): 3 hours 5 minutes
Stopped Time (GPS): 1 hour 8 minutes
Mileage (GPS): 7.6 miles
Avg Speed (GPS): 1.8 mph
Elevation Gain: 1,266 feet gained / 2,149 feet lost
Max Elevation: 6,657 feet
Weather: Clear and sunny.
Winds: 2-5 mph SW.
Air Temp: 57F at the Obstruction Point trailhead climbing to 60F at the Deer Park Ranger Station. I was comfortable in a long-sleeve t-shirt and shorts except I got a little chilly during some windy parts on top of the ridge.
Trail: Well-defined
hard-pack dirt or gravel trail. Some along the side of pretty steep and slippery slopes. No trail markers, and there were a few spots
where there were forks in the trail, but they were labeled with signs.
Crowds? Not crowded, but not alone. There were about a dozen cars parked at the Obstruction Point trail head. We passed well over a dozen people along the way going in both directions.
Hazards? Some steep
dropoffs. No sources of water. I've heard to beware the mountain goats that can be
aggressive in ONP, but we didn't see or hear of any.
Geocaches? Didn't bother looking - assumed there were none because it's a National Park.
Kit: Long sleeve T-shirt, shorts, new Merrell Moab Gortex hiking boots, flop hat, walking stick.
Route: Followed the path of hike #9 in the Best Easy Day Hikes: Olympic National Park book. Started at the Obstruction Point trailhead and ended at the Deer Park trailhead. Had a shipmate drop us off at one end, drive around and pick us up at the other end.
Facilities: There was a privy at the Obstruction Point trailhead and a privy at the Deer Park trailhead, but nothing in between. There are no sources of water along this trail.
From September 2007 to September 2008, this blog started out as a journal of my family's adventures around Hawaii. Then from 2008 to 2011, we lived in the Northern Virginia (NoVA) suburbs of Washington, DC. From the spring of 2011 to 2013, we called the Pacific Northwest "home." In June 2013, we moved back to the DC suburbs again. I like finding cool things for us to do that get us out of the house, so I will continue to blog about our adventures around the DC area, as well as periodic musings about whatever else strikes me as funny or odd. Note: These are my frank and honest opinions. Nobody is paying me to write anything in my blog.
Gouge Index (a.k.a. Links to Common Topics in My Blog)
My name is Kevin. I'm 40-something. I have a lovely wife (LW) and two great little boys, Eldest Son = ES and Younger Brother = YB (in older posts, I previously referred to him as Youngest Son or YS). I'm a submarine officer, and I've been in the Navy for 21+ years.
I started this blog to document our family adventures around Hawaii for family and friends. After that we moved to DC and then to Bremerton, WA. We have since moved back to the DC suburbs and I continue blogging about my random observations of life.
If you would like to contact me, you may email me at blunozblog at hotmail dot com.
Geocaching!
My wife refers to me as a "crack addict" when it comes to geocaching. Geocaching is like a scavenger hunt with a GPS receiver. People hide stuff in the woods and post the GPS coordinates on the geocaching website, and techno-gadget geeks like me go hiking in the woods looking for them. My wife calls it "Geek-meets-Nature."
It's the only magazine I have consistently kept a subscription to and read every month. Although I don't agree with the magazine's recurring theme of agnosticism / anti-religion, I skip those articles and soak up all the cool electronic gadgets and technology articles.
Outside Magazine is another new favorite of mine. One thing I really like about Outside Magazine is the photography. The pictures are absolutely amazing, but there's more to it than just the picture. Outside Magazine includes a short description of who the photographer was and how he/she got into position to capture the shot at just the right moment.
What I'm listening to...
KLOVE - contemporary Christian music
or First Wave - 80's alternative music on Sirius channel 22.
Where'd I get the name "blunoz" from?
On my first deployment as a junior officer on USS PROVIDENCE (SSN 719), I had the awesome experience of going north of the Arctic Circle. The Navy has many customs and traditions, and when you cross a significant invisible line in the ocean like the Arctic Circle or the Equator, you have to go through an initiation ceremony. When I returned from that first deployment, I got a new license plate on my car, but had to fit it into 6-letters, so I condensed blue nose into "blunoz."